Managing Controller Source Code
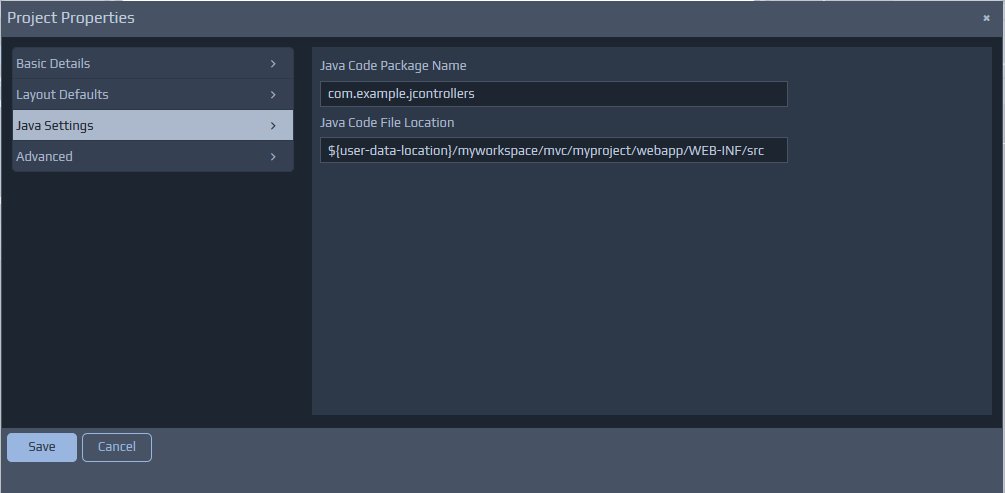
You can organise the source code for Java Controllers by using the Java Code File Location and Java Code Package Name entries under the Java Settings section of the Project Properties dialog. All the Java Controller classes within a project must be in the same Java package.
Controller Architecture
Before we start to explore the contents of Java Controllers, it is worth recapping on some of the relevant components within the WebMaker Runtime architecture. The diagram below provides a high-level view of this architecture, focusing on the data bindings and the flow of incoming and outgoing information between client (Browser) and server.
 WebMaker provides the ability to bind the data within a web page in two directions. When information is submitted from the browser, an arbitrary XML document structure can be populated with the information contained within the submitted XHTML form. When a page is sent to the browser, another arbitrary XML document structure on the server can be used to bind XML fields to HTML fields on the web page. This bi-directional binding can be performed graphically within the WebMaker Page Design - Bindings tabs. Controllers on the server handle the requests and also compose the response structures that are then transformed by WebMaker to produce the HTML response to the Browser.
Java Controllers provide the ability to write Java code to perform the desired tasks on the server. What you do here is dependent on your application scenario, technology standards and architecture.
The Java controller class must implement the JavaController interface. This interface defines a processRequest method which should be used to perform all the required processing. The general aim of this method should be to manipulate the incoming data so that it matches the format expected by the next screen.
The incoming information submitted from the screen is made available to the Java controller through the RequestData object passed as a parameter to the processRequest method.
The information between the client and server is bound for you. Therefore, by the time you receive the information it will be in the structured 'eForm' format that you see within the studio. By default, WebMaker deals with the data in XML format. An example incoming message might therefore look like:
WebMaker provides the ability to bind the data within a web page in two directions. When information is submitted from the browser, an arbitrary XML document structure can be populated with the information contained within the submitted XHTML form. When a page is sent to the browser, another arbitrary XML document structure on the server can be used to bind XML fields to HTML fields on the web page. This bi-directional binding can be performed graphically within the WebMaker Page Design - Bindings tabs. Controllers on the server handle the requests and also compose the response structures that are then transformed by WebMaker to produce the HTML response to the Browser.
Java Controllers provide the ability to write Java code to perform the desired tasks on the server. What you do here is dependent on your application scenario, technology standards and architecture.
The Java controller class must implement the JavaController interface. This interface defines a processRequest method which should be used to perform all the required processing. The general aim of this method should be to manipulate the incoming data so that it matches the format expected by the next screen.
The incoming information submitted from the screen is made available to the Java controller through the RequestData object passed as a parameter to the processRequest method.
The information between the client and server is bound for you. Therefore, by the time you receive the information it will be in the structured 'eForm' format that you see within the studio. By default, WebMaker deals with the data in XML format. An example incoming message might therefore look like:
<?xml version="1.0" encoding="UTF-8"?>
<mvc:eForm xmlns="http://www.hyfinity.com/xplatform" xmlns:mvc="http://www.hyfinity.com/mvc" xmlns:xg="http://www.hyfinity.com/xgate">
    <mvc:Control>
        <Page xmlns="http://www.hyfinity.com/mvc">ContactDetails.xsl</Page>
        <Controller xmlns="http://www.hyfinity.com/mvc">mvc-Contacts-JGetContactsList-Controller</Controller>
        <action xmlns="http://www.hyfinity.com/mvc">getJContactDetails</action>
        <unbound_param xmlns="http://www.hyfinity.com/mvc">value</unbound_param>
    </mvc:Control>
    <mvc:Data>
        <mvc:formData>
            <mvc:forename></mvc:forename>
            <mvc:surname></mvc:surname>
        </mvc:formData>
        <GetContactRequest Successful="" Version="" xmlns="http://www.hyfinity.com/schemas/tutorial" xmlns:demo="http://www.hyfinity.com/schemas">
            <Contact>
                <ContactId>10346</ContactId>
            </Contact>
        </GetContactRequest>
    </mvc:Data>
</mvc:eForm>
The final response data after the controller has completed processing should be in this same format, and this complete document is transformed to produce the response pages, as defined within WebMaker. Please remember that any submitted elements that failed to bind will be placed under the Control/unbound_param element.
Let's now return to an example Java Controller generated by WebMaker:
package com.example.jcontrollers;

import com.hyfinity.java.JavaController;
import com.hyfinity.java.RequestData;
import com.hyfinity.utils.RequestIdentification;
import com.hyfinity.xagent.XAgentCallback;

public class Controller_1 implements JavaController
{

    /**
     * Perform any initialisation required for the Java Controller.
     * @param acb Callback interface to access platform services.  Will be null if the full platform is not available.
     */
    public void init(XAgentCallback acb)
    {

    }

    /**
     * Main processing method.
     * @param rd This provides all the data for this request.  This should be updated in place as required.
     *           See the RequestDetail docs for details.
     * @param requestId details the session Id and request ID values for the current request.
     */
    public void processRequest(RequestData rd, RequestIdentification requestId)
    {

        rd.setPageName("MainForm");


    }

    /**
     * Used to handle any shutdown requirements.
     */
    public void shutdown()
    {

    }

}
}
Within each Java Controller, it is the processRequest method that needs to be implemented to perform the required functionality.
The rd incoming parameter is the RequestData object providing access to the incoming data. The infomation this contains should be updated accordingly during the processing of the processRequest method.
Controlling Page Flow
The RequestData object provides a simple method (setPageName) for setting which page to display next. As shown above, this method takes in a single parameter specifying the name of the page to display. Once the processRequest method has completed, the page name from the very last call to setPageName will be used to actually render the page and display it to the user.
If you wish to know the name of the action that has been invoked to determine which processing to perform, then this can be easily obtained using the RequestData getActionName method.
Accessing the data values
As mentioned above, WebMaker internally processes the data in XML format, and if you are happy with this approach, you can easily get at the data in this way by using the getAsXML method on the RequestData object. This will return an XDocument object which wraps a DOM representation of the XML data and provides some additional helper methods.
Alternatively, you can access the incoming data in JSON format by using the getAsJSON method on the RequestData object instead. This will return a JSONObject containing the incoming data. Only one data access method can be used for a given request.
To help illustrate how these two approaches can be used, the following fragments provide an example of how you could combine two submitted 'formData' values to produce a third value for later display on screen.
XML Approach
XDocument data = rd.getAsXML();
data.addNamespace("mvc", "http://www.hyfinity.com/mvc");
String forename = data.selectString("/mvc:eForm/mvc:Data/mvc:formData/mvc:forename");
String surname = data.selectString("/mvc:eForm/mvc:Data/mvc:formData/mvc:surname");

Element fullNameElem = data.getDocument().createElementNS("http://www.hyfinity.com/mvc", "fullName");
com.hyfinity.utils.xml.DOMUtils.setText(fullNameElem, forename + " " + surname);

data.selectSingleNode("/mvc:eForm/mvc:Data/mvc:formData").appendChild(fullNameElem);
JSON Approach
JSONObject data = rd.getAsJSON();

JSONObject fd = (JSONObject) new JSONPointer("/eForm/Data/formData").queryFrom(data);
fd.put("fullName", fd.get("forename") + " " + fd.get("surname"));
Note: Even when using the JSON data format within your Java controller, WebMaker will convert this back to XML data internally in order to perform the transformation that renders the next screen. In certain scenarios, this transformation process may alter the ordering of child elements from the original XML data. If this occurrs, it is unlikely to cause any issues, but you can always fall back to the getAsXML approach instead.
Compiling and Running Java Controllers
You can use the in-built WebMaker Editor or a Java Development tool of your choice to author and compile the Java classes for each controller. WebMaker will autoamtically create a sample Apache Ant build.xml file for compiling the code, but you are free to use whatever tool suits your workflow. You will need to ensure that the WebMaker xplatform.jar file is on your classpath for the code to compile successfully. This jar is located within the {Install Location}\design\tomcat-design\lib directory of a standard WebMaker installation.
The easiest way to ensure your classes are picked up when testing or publishing the project is to place the compiled code within the webapp directory for the project. eg {Install Location}\users\{user name}\{workspace name}\mvc\{project name}\webapp\WEB-INF\classes\lib. If you use the default code location and the generated build script then this will happen automatically.
This compiled code will then be included correctly when you use the Run Test or Publish actions in the WebMaker Studio. You can use the Debugger to check execution details via the View Debugger tab. This will also show details of any errors, including the inability to locate the controller or inability to execute the controller, etc. You may need to adjust the Platform Log Level to debug in the Test Settings or Publication Settings dialogs as appropriate to make sure you are getting all available information logged to help resolve any errors.
Important: If you are using a runtime environment that runs multiple applications within one Java webapp (such as the default BizFlow WebMaker publication) then the compiled code will not be automatically picked up as above, and you will instead need to manually ensure the code can be loaded by the application server in use.